Test API requests
Using Insomnia
Created by

Suchitra Giri
suchitraYou will need
Step-by-step instructions
Step 1
Create an Insomnia account
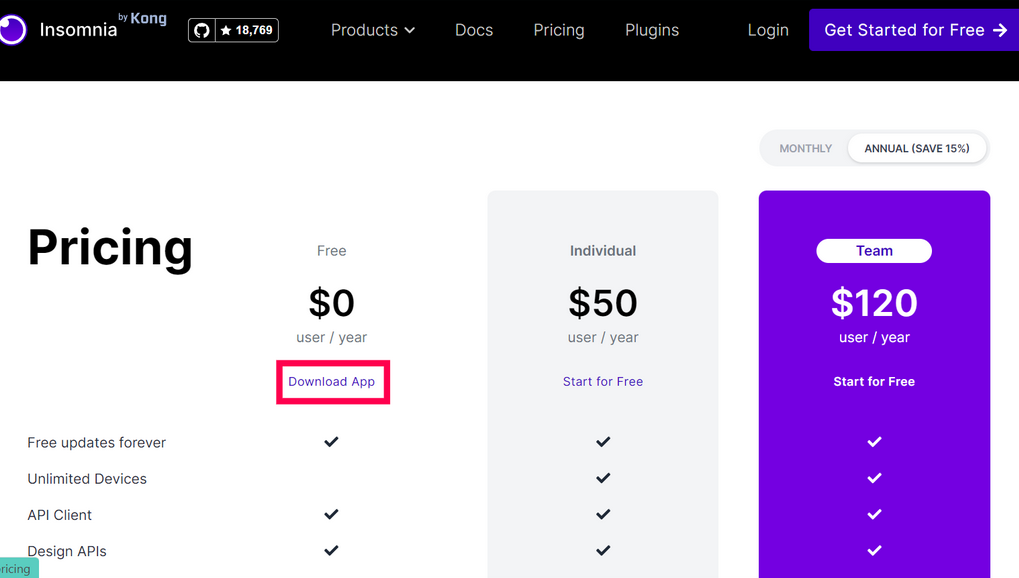
- Go to Insomnia website and press Get started for free. Although there are different plans such as Individual, Team, and Free, in this guide, we go will go with a free plan
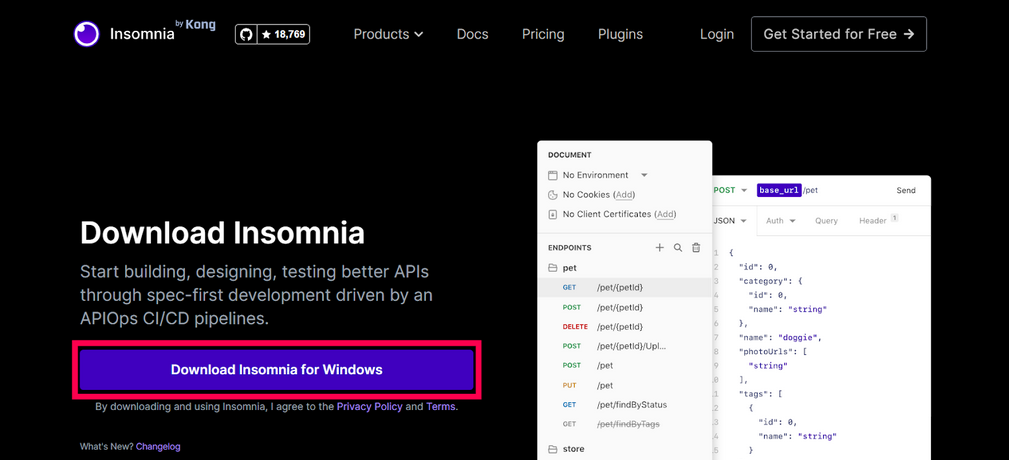
- Press "Download App" button under "Free, $0" plan. Then press "Download Insomnia" to get an Insomnia version for your OS
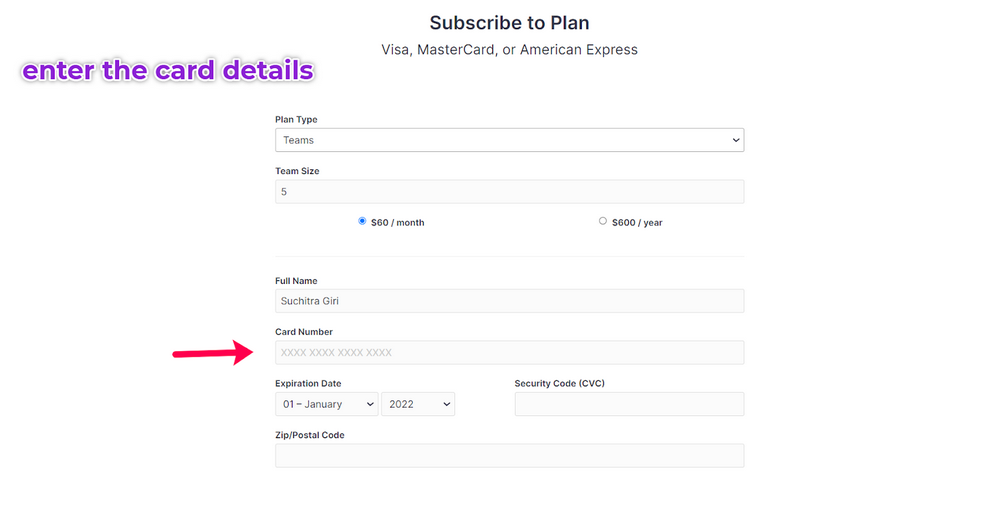
- If you select a paid account, you will need to provide payment details and team size, then confirm

Step 2
Set up the Insomnia app
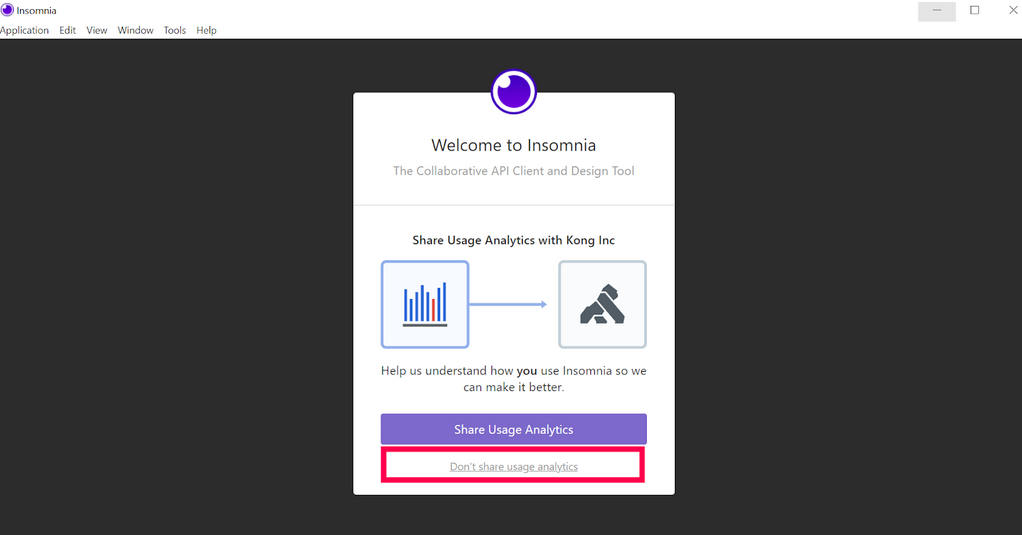
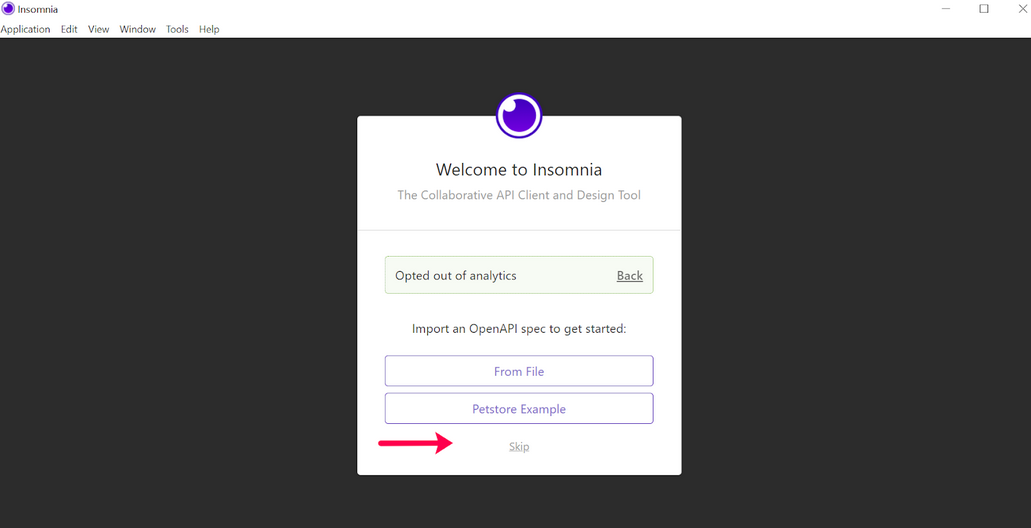
- When we open Insomnia the first time, a "Welcome to Insomnia" page will pop up. Select whether you want to share usage analytics with developers. We pick "Don't share usage analytics" in this example
- You can import an OpenAPI specification if you have one. We press "Skip" here
Step 3
Create a Request Collection
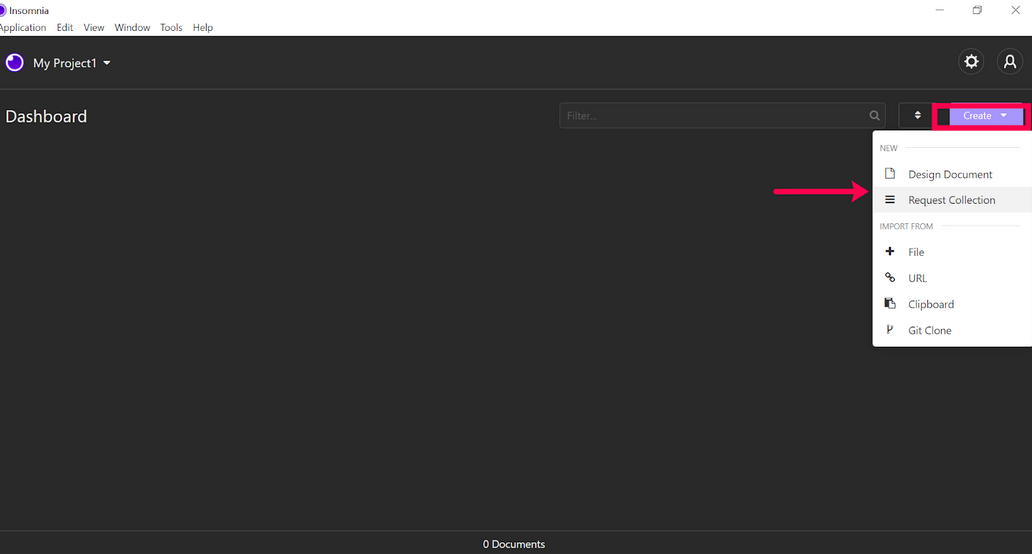
- Your test API requests are structured into Collections for ease of authoring. Collections let you quickly navigate, document, and test out your APIs
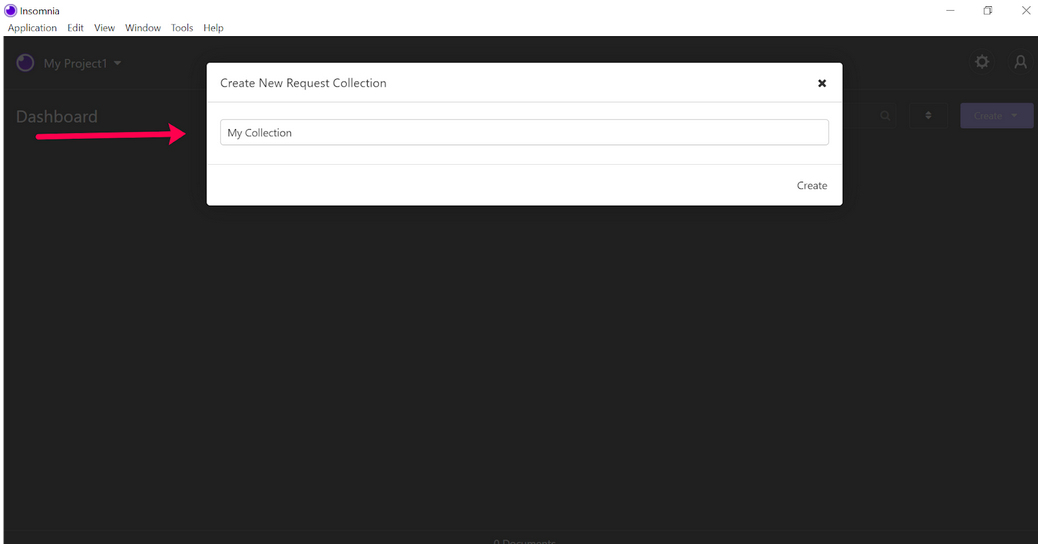
- Create a Request Collection by clicking "Create", then "Request Collection". Specify a name for your Collection and press "Create"
Step 4
Create a Request
- There are five HTTP methods such as GET, POST, PUT, PATCH, DELETE. Read more about them in MDN docs
- We use a dummy API provided by jsontest.com in this example
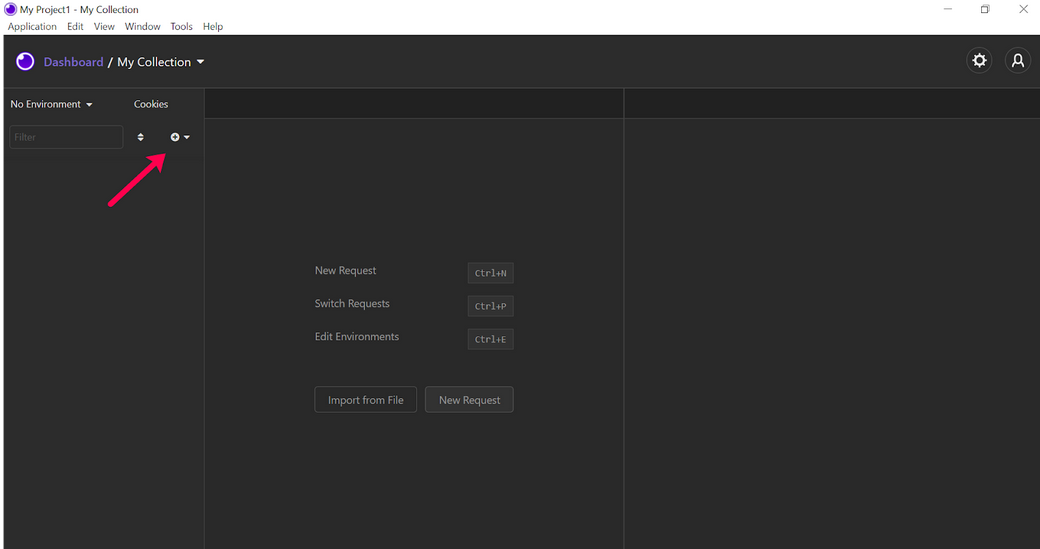
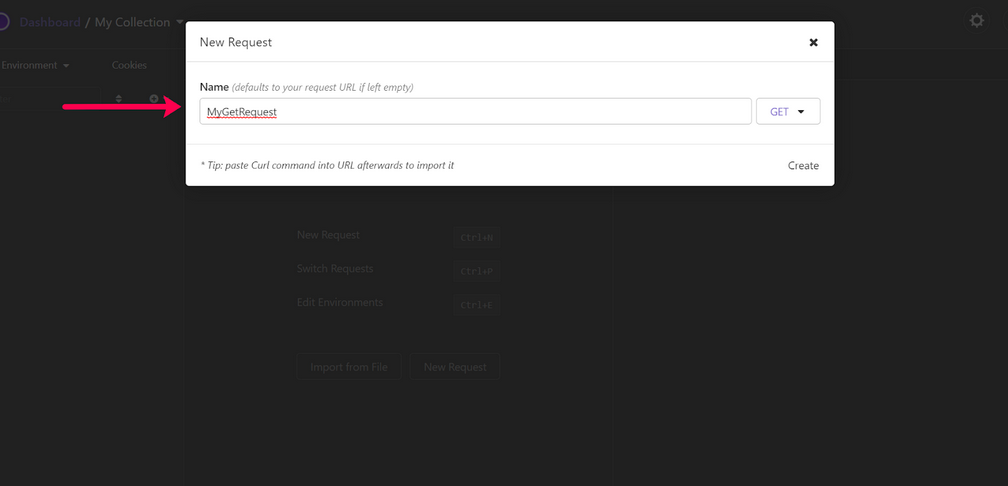
- Press the "+" button under your collection or use the
Ctrl/CMD+Nkeyboard shortcut to create a new request - Specify a name and request type (e.g. "MyGetRequest" and "GET") and press "Create" to confirm
- If you have a Curl command to import, you can do this in the next step
Step 5
Send a test Request to your API
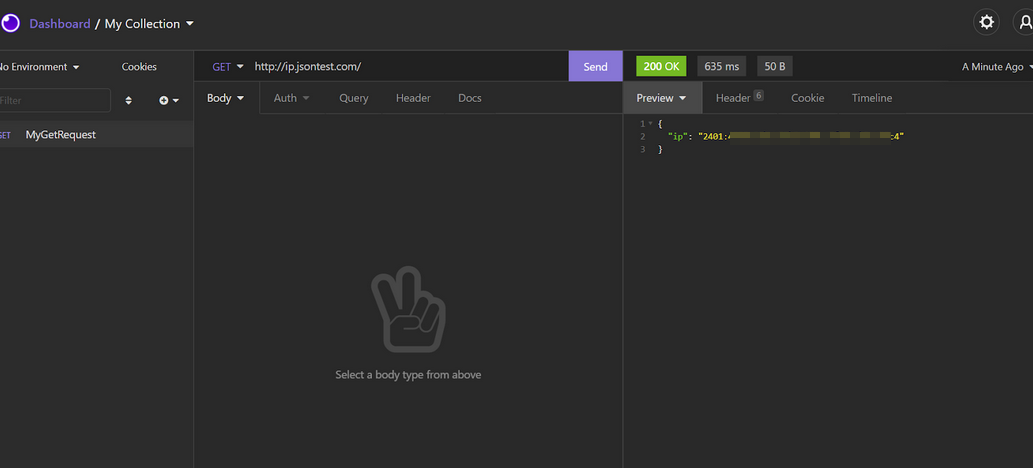
- Enter the URI of your application (a dummy API URI in our case) into the URI field
- (Optional) If it's not a GET request, add request body into the "Body" section
- (Optional) if your API requires authorization or other headers, configure them using the "Auth" menu (for authorization), or "Header" (for other headers)
- Confirm the request type (E.g. "GET") is correct, and press the send button
If all goes fine and your request is successfully received, you will see a “200” status code, meaning "Success". You just interacted with the server using an API call. In this case, we got JSON data back from the server, which you can see on the right-hand side preview section.

The result
↑ Press to view all guides for this result

