Add Google Analytics to Shopfiy
Using Google AnalyticsShopify
Created by
Shakil
shakilYou will need
Step-by-step instructions
Step 1
Check Google Analytics installation
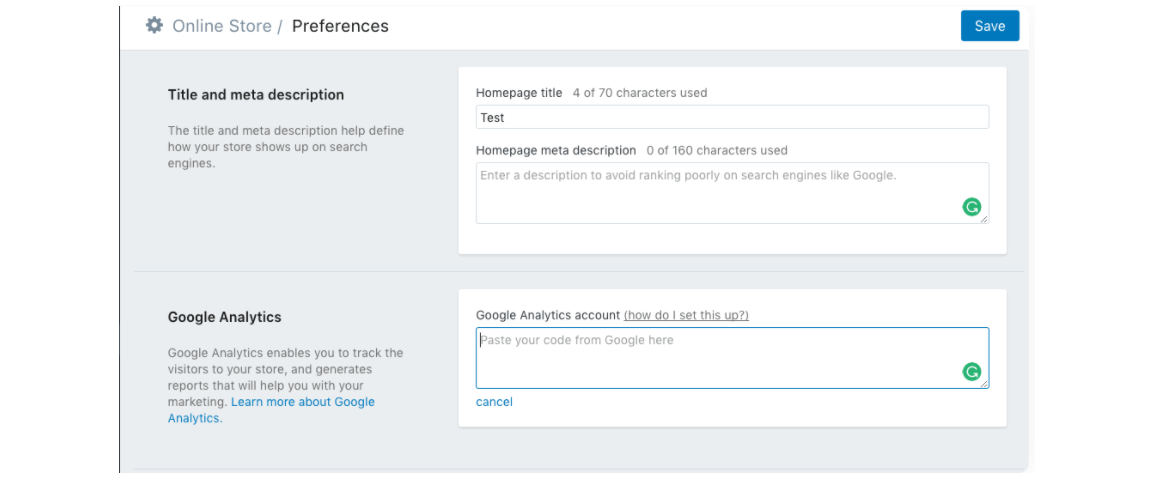
- Go to your Shopify Admin, then Online Store, Preferences
- In the Google Analytics section, make sure that the field says "Paste your code from Google here". If there is no code in this field, proceed to the next step. If you see the code that starts with UA- instead, Google Analytics is already activated
Then, do the following:
- Go to Themes, then Actions > Edit Code
- In Layout click on
{/} theme.liquid - Look for one of the following Google Analytics tracking tags in the
theme.liquidfile: ga.js, dc.js, gtag.js, or analytics.js - If you see any of these tags in your theme.liquid file, you already have Google Analytics activated. You will need to remove existing code first before you proceed. See a discussion on this here
Step 2
Sign up with Google Analytics
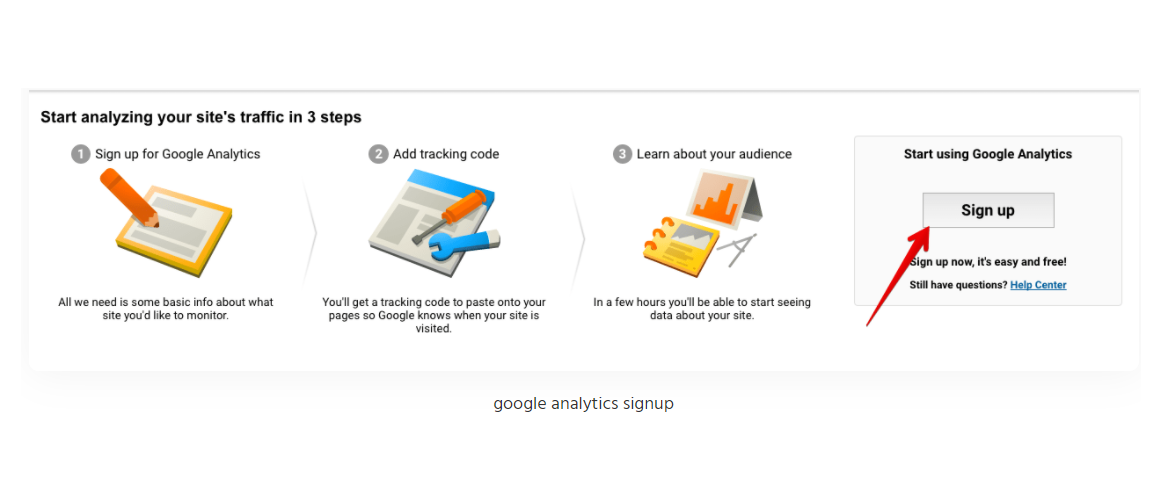
- You need a Google Analytics account. If you already have one, skip this step. To create an account, go to Google Analytics homepage and press "Sign up". If you already have a Google account, you can use it to sign in on this step
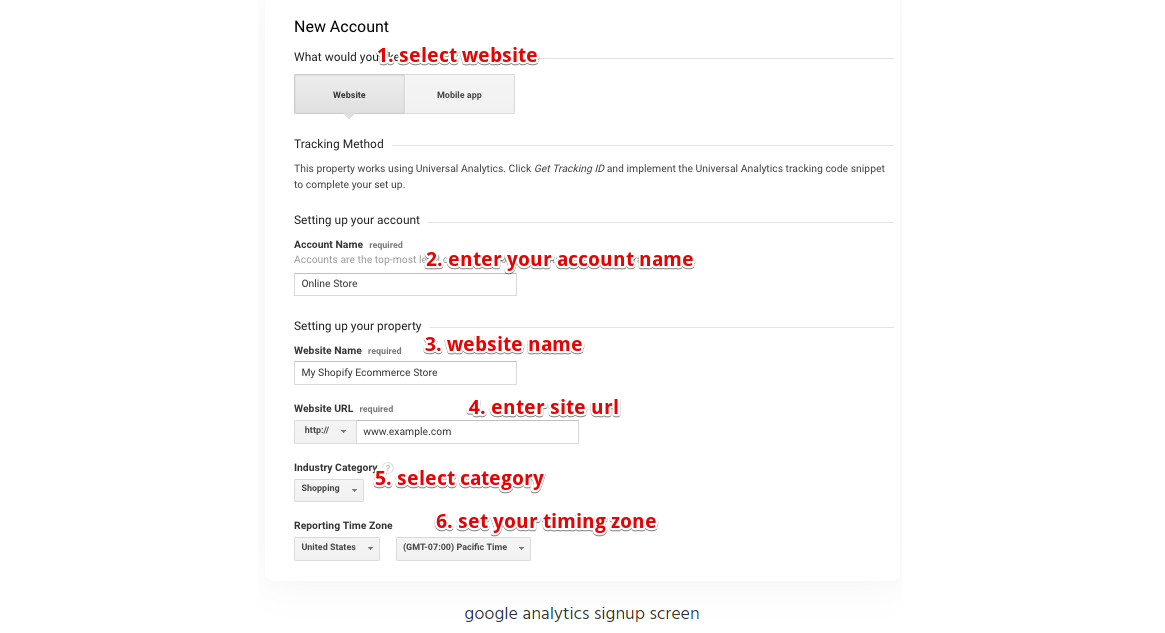
- The next screen gives you the option to choose between a website and a mobile app. Press "Website"
- Enter the Analytics account name, website name, site URL, select an industry category from the drop-down list, and scroll to the bottom of the page without changing the other checkboxes by default
Step 3
Get a Google Analytics tracking ID
- When signing up for a Google Analytics account, press the “Get Tracking ID” button. A pop-up window will appear, showing the Google Analytics Terms of Service. Read and, if these terms work, press the "Agree" button. You will be redirected to your Google Analytics account.
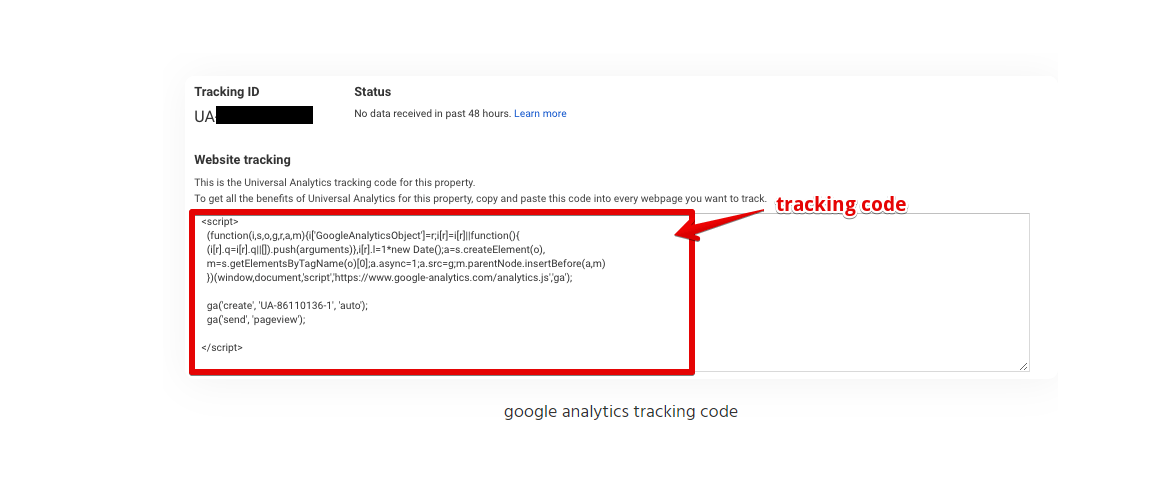
- The first time you visit your Analytics account, you'll be taken to the tracking information section of the website. Here you can see the tracking IDs and scripts to use for website tracking
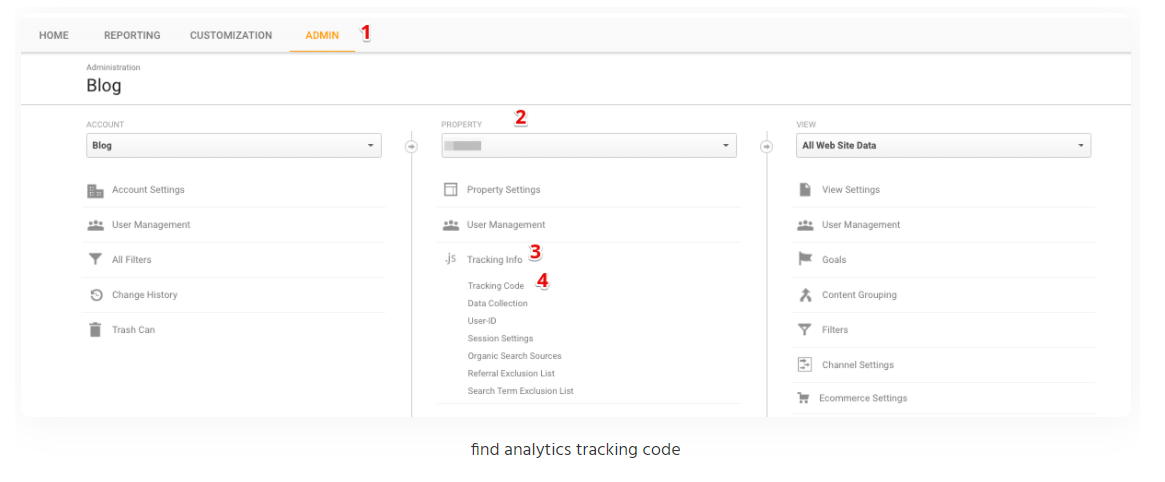
- To find you tracking script in your Google Analytics account, press Admin, then Property, Tracking info, Tracking code
- Copy the tracking code between the
<script></script>tags
Step 4
Add Google Analytics script to a Shopify store
- Once you have a Google Analytics tracking code, sign into your Shopify account
- Open your Shopify Admin dashboard, then go to Online Store, Preferences
- Paste the Analytics tracking code in Google Analytics, Google Analytics account field
- Press Save. Done!
Step 5
Set up Basic E-Commerce tracking in Google Analytics
Google's E-Commerce tracking can be implemented at two different degrees of detail.
- Basic E-Commerce tracking when only transaction and revenue data is needed
- Enhanced E-Commerce tracking, when additional information about visitor behavior is needed For Basic E-Commerce tracking:
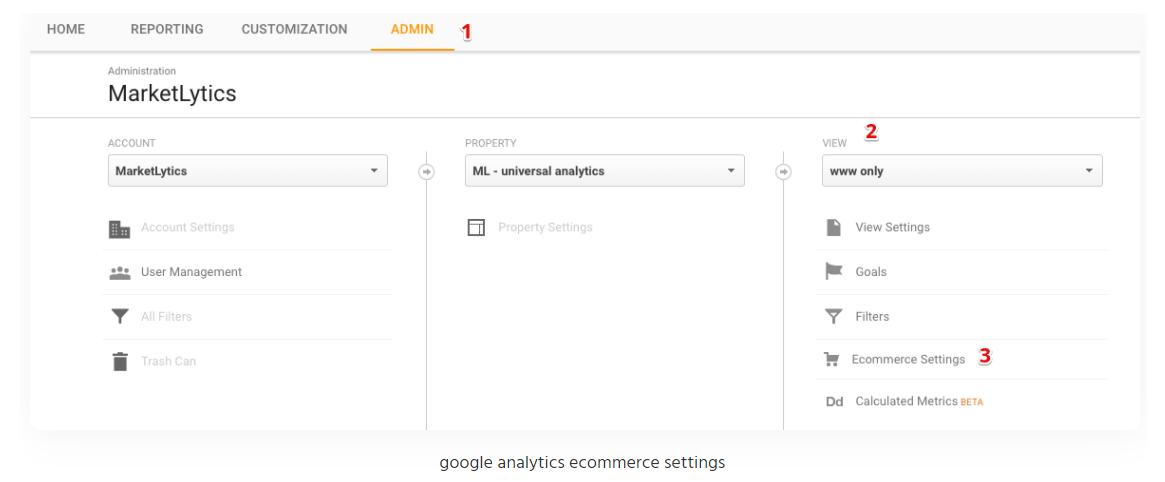
- From Google Analytics Admin, in View, press E-Commerce Settings
- Press Enable E-Commerce switch to toggle it from Off to On
Step 6
Enable enhanced E-Commerce Google Analytics tracking
To set up Enhanced E-Commerce tracking:
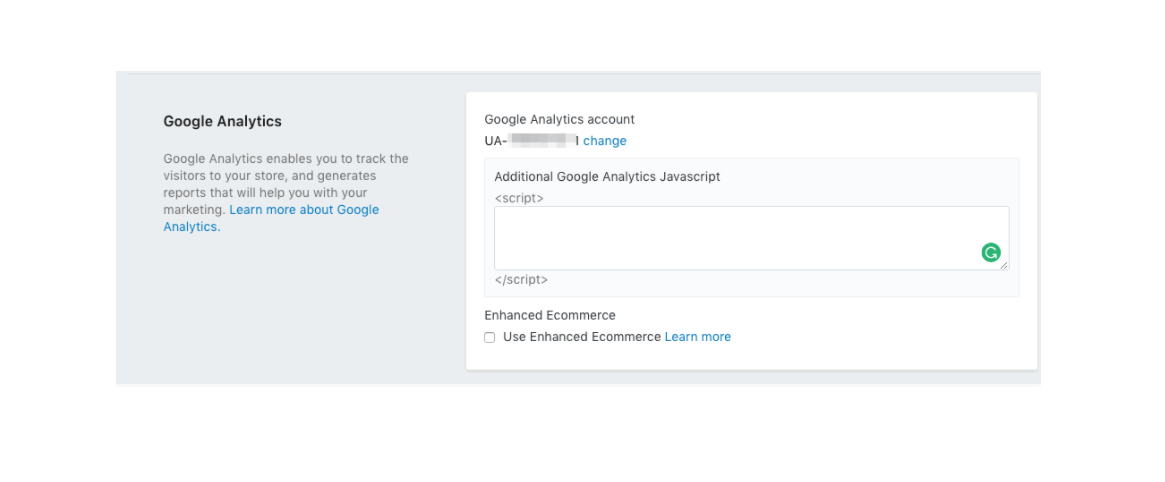
- On your Shopify Admin go to Online, then Preferences
- In the Google Analytics section, enable Use Enhanced E-Commerce option.
- If you are using an older version of Google Analytics, you may need to click Update to the Latest Version before checking the Use Enhanced E-Commerce checkbox
- Click Save. This allows Shopify to track all your website data and send it to Google Analytics.
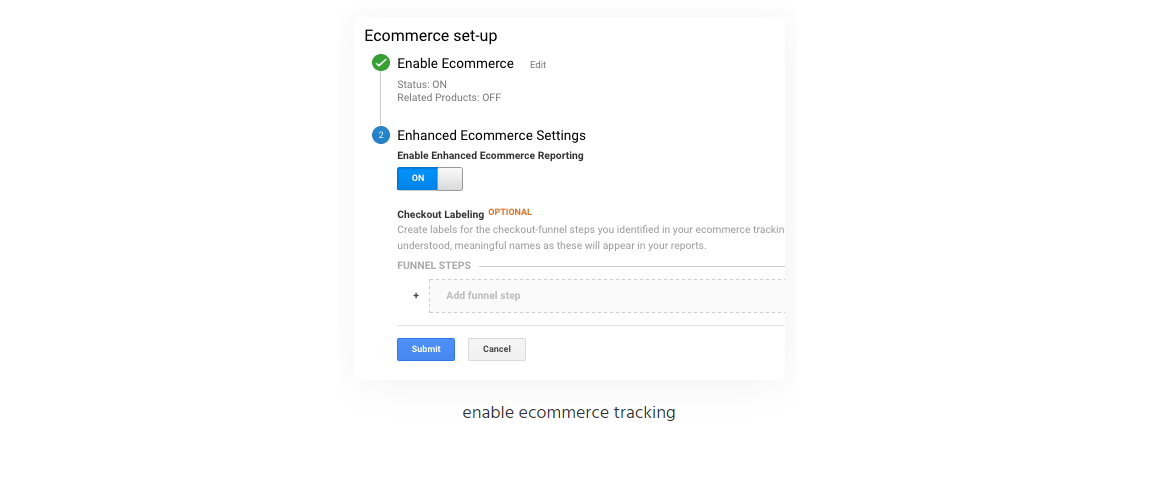
- Now go to your Google Analytics Account, Admin, and in the View column
select Ecommerce Settings - Press Enable Enhanced E-Commerce Reporting toggle to switch it from off to on. Then press Save
The result
↑ Press to view all guides for this result

