Plan a Marketing Campaign
Using HubSpot
Created by
Shakil
shakilYou will need
Step-by-step instructions
Step 1
Create a campaign
- In your HubSpot account, Go to Marketing > Campaigns
- In the upper right, click Create campaign
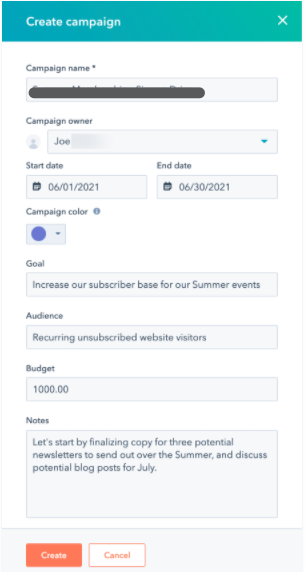
- Set up your campaign in the dialog box. You can change all the details of your campaign after it has been created
- Choose a campaign name. This must be a unique campaign that other users easily understand in their Hubspot account
- Select your Campaign owner
- Select the Start and Finishing date of the campaign
- Choose a campaign color to organize and prioritize your campaigns. All the tasks that you assign to your campaign will be displayed on your marketing calendar in the selected color
- Enter an objective to summarize the objective of your campaign. You can adjust certain goals such as the number of contacts or sales influenced after creating the campaign
- Enter an audience so your team understands who your campaign is targeting
- Enter a Budget
- Add notes to keep track of all the other details that are important to you and the rest of your team.
- Press Create to confirm campaign creation

Step 2
Add campaign goals
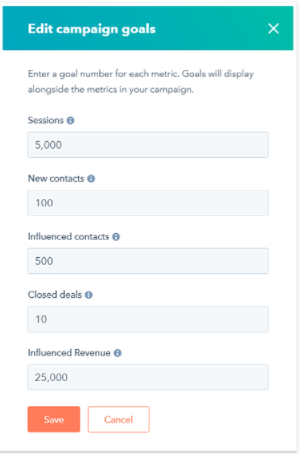
Now you can add specific goals for the campaign.
- Click the Actions drop-down menu in the upper right corner and select Edit Goals
- Enter the destination numbers for sessions, new contacts, influenced contacts, closed deals, and influenced revenue in the dialog box
- Press Save

Step 3
Add marketing assets and content
You can now add your existing marketing content and assets to your campaign (think blog posts, emails, landing pages, etc.).
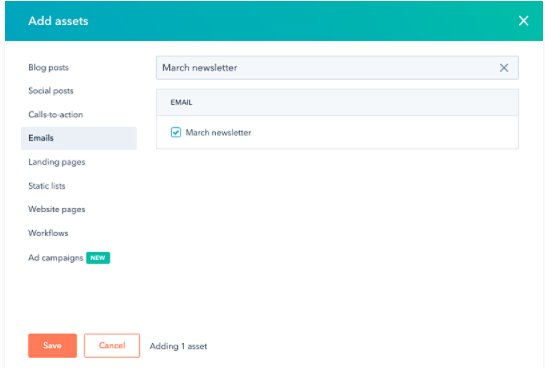
- In the top right, click Add assets.
- In the dialog box, select an asset type in the sidebar menu at the left to add to the campaign.
You can search for assets or content using the search bar. Select the checkbox next to an asset to add it to the campaign. When you're done, click Save.
Note: Adding assets or content that is already linked to another campaign to a new campaign will remove them from your current campaigns. Only workflows can be assigned to multiple campaigns.

Step 4
Create a campaign tracking URL
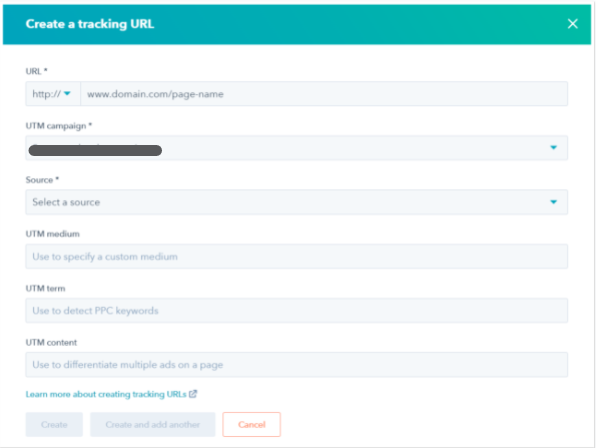
Finally, you can create a tracking URL for the campaign.
- In the upper right, click the Actions dropdown menu and select Create tracking URL
- Enter a URL in the dialog, select a UTM campaign and source. You can also specify a UTM medium, a UTM term, and UTM content
- When done, click Create or click Create and add another to create another tracking URL for the campaign

The result
↑ Press to view all guides for this result

